Search
User login
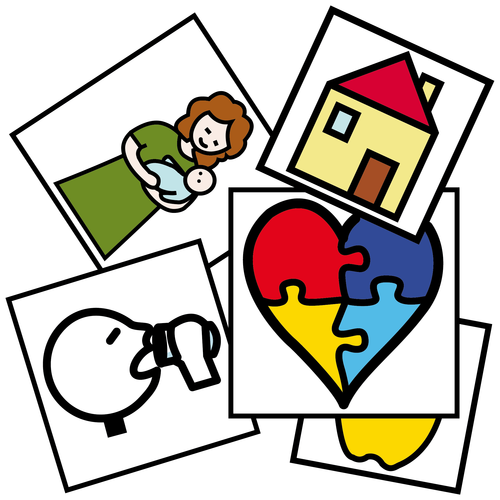
Topic “Symbols”
Picture or iconic symbols.


Using visual timetables
Ideas for using visual timetables.
Visual timetables are an easy and powerful way to help children to stay engaged with lessons and to support their understanding of what's going on and what they need to do.
Research evidence shows that this type of support can reduce anxiety and confusion whilst supporting a child's memory for what they need to do in tasks.
Example visual timetables
You can use a visual timetable to map out the whole day:
Core communication board

Core communication board using ARASAAC symbols (https://arasaac.org). For use with everyday communication.
Note: if re-distributing with the ARASAAC symbols, this must be done non-commercially only.
You can make your own core communication board using different symbols with the Commtap Symboliser for PowerPoint.
Created 25 June 2022; updated 6 December 2024.
Core communication boards

Full core communication board plus a simplified version. Uses Noun Project icons - can be used in any context as long as the icons are attributed.
Created 17 March 2022; updated 12 May 2025.

ARASAAC Symbols - Colour
Arasaac picture symbols in colour
Picture symbols for over 11000 words in English from the Aragonese Portal of Augmentative and Alternative Communication. You can use these in your documents or you could use it in conjunction with the Commtap Symboliser for PowerPoint. The image format used in this set is "png" which is a commonly used image format.
Encouraging eye gaze communication (no tech)
")
Created 16 November 2016; updated 6 December 2024.
Encouraging eye gaze communication (no tech)
Helping a child to use/begin to use an eye gazing to communicate choices or an action they would like you to do - with pictures and (optionally) a perspex eye gaze frame (i.e. sheet of clear plastic you hold up between you and the child to fix communication pictures on).
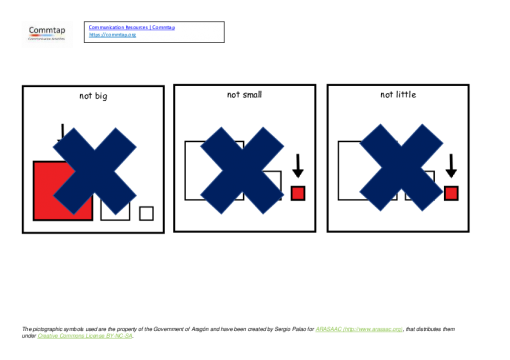
Encouraging looking at an appropriate picture
In this situation you know what the child wants - e.g. they want the mirror chimes, or they want you to spin them, but they are not looking at the appropriate picture or picture symbol. This can happen if the child is new to this communication method, or you've put pictures in a different position on the frame in front of the child, or you are presenting new picture symbols.
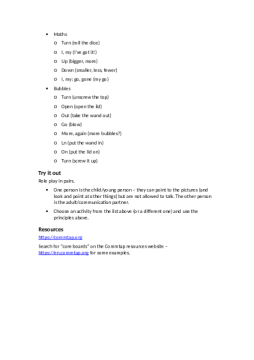
Try
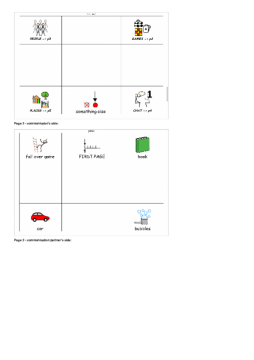
Make an Eye Gaze Communication Book using PowerPoint

Created 23 May 2016; updated 24 August 2021.
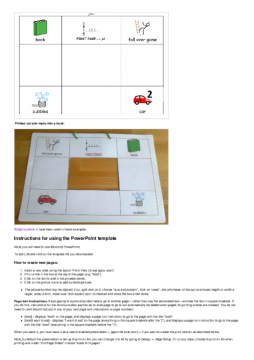
Make an Eye Gaze Communication Book using PowerPoint
Using a PowerPoint template to easily create Eye Gaze communication frame books.
This PowerPoint template speeds up the creation of eye gaze communication frames:
Select a picture on an eye gaze frame
| Activity/strategy name and materials required | How to do the activity | Key principles for doing the activity and comments |
|---|---|---|
| Picture pairs Plastic perspex sheet with hole in the middle, around 40cm x 30cm (e.g "E-tran frame"); Two sets of everyday picture cards - or whatever the student is interested in. |
| If the student has difficulties, you can try pointing it at each position on the frame - starting from their top left and working across and down - say "is it here" at each position ("no!") - until you get to the right position, say "yes" "here's the....". Say "look at the....", then ask them and say "where was the....?" - taking your eyes slowly to the position - trying to take the student's eyes with you. When you get there, take it off, pretend to eat it (for example) and then put it on the "done" pile with the other card. More ideas about this here from Call Scotland. Going further When a student can do this with one picture, try adding more pictures on the frame (distractor pictures). Start with two, then three/four (one on each corner), then gradually up to seven (each corner and the middle of each side except the bottom side. Put the target card - the one you are working on - in one of the positions you are using. |
| Find the picture/item Plastic perspex sheet with hole in the middle, around 40cm x 30cm (e.g "E-tran frame"); Two sets of everyday picture cards - or whatever the student is interested in. | If the student has difficulties, you can try pointing it at each position on the frame - starting from their top left and working across and down - say "is it here" at each position ("no!") - until you get to the right position, say "yes" "here's the....". Say "look at the....", then ask them and say "where was the....?" - taking your eyes slowly to the position - trying to take the student's eyes with you. When you get there, take it off, and pretend to eat it/drive it etc. More ideas about this here from Call Scotland. Going further When a student can do this with one picture, try adding more pictures on the frame (distractor pictures). Start with two, then three/four (one on each corner), working up to seven (each corner and the middle of each side except the bottom side. Put the target card - the one you are working on - in one of the positions you are using. | |
| Confirmation using a "special spot" Plastic perspex sheet with hole in the middle, around 40cm x 30cm (e.g "E-tran frame"); Two sets of everyday picture cards - or whatever the student is interested in. | The idea of this activity is for the student to learn how they can confirm a choice. It is necessary to have some way of them confirming a choice because:
All these will make it difficult to be sure what they are trying to communicate. The "special spot" (which could for example be a red circle stuck in the bottom middle of the frame) can be a point that a student to look to to:
|
Text mangle tool
See the "comments" link associated with this page for more information about this tool.
What this tool is for
The purpose of this tool is to be able to get a flavour of:
- What an early reader might get from text;
- What can be gained from text where only a selected number of high frequency words are used;
- How a strategy of signing could assist comprehension;
- Or...to create your own Jaberwocky poem!
See the comments page for more information on this tool.
Support Commtap to keep it online
Thank you for visiting Commtap.
Please read this message as it is extremely important.
- Visitor donations mean we can continue to host over 1,000 free activities to support speech, language, and communication development.
- Visitor donations mean we can continue to provide free resources to address a wide range of communication needs, including limited speech or language, interaction challenges, and needs associated with conditions such as developmental language disorder, autism, and cerebral palsy.
- Visitor donations mean we can continue to provide resources to support the work of speech and language therapists, teachers, teaching assistants, parents, and carers.
- Visitor donations mean we can continue to provide the free key word sign dictionary (bks.org.uk) which has over 2,000 Makaton and Signalong signs.
We know that not everyone is able to afford to pay to access these resources, however, if you can, please make a donation to keep the site going.
Thank you

Google ads on this page are provided by Google Adsense - and their presence does not imply any endorsement by Commtap. Report a problem with an ad on this page. Log in (for free) to avoid seeing Google ads.