Search
User login
Topic “Secondary (11-16yrs)”
Secondary school age (11-16 years)
Understanding and hearing the difference between noisy (voiced) and quiet (voiceless) sounds
| Activity/strategy name and materials required | How to do the activity | Key principles for doing the activity and comments |
|---|---|---|
| Understanding the concepts of noisy/quiet | 1. Before working on the activities below, make sure your child has an understand of the concepts of noisy/quiet. Click on link under materials section for activities relating to these concepts.
| |
| Noisy/Quiet Speech Sounds - printable noisy/quiet symbols - sound picture cards - you may have a set of phonic cards given to you by your speech and language therapist or education setting (e.g. Jolly Phonics, Nuffield Dyspraxia Resources) - Use these resources if you have them. If you do not have a set of phonic resources you can use click here to for a printable resource. - optional - you could use noisy/quiet characters from Mr Men books by Roger Hargreaves. | Once your child is able to recgonise the differene between noisy and quiet sounds you can move on to: 1. Listening to the difference between sounds in words 2. To add link - production of sounds | |
|
|
Identifying and saying the correct sound blend at the beginning of words
| Activity/strategy name and materials required | How to do the activity | Key principles for doing the activity and comments |
|---|---|---|
| Stick it - A piece of paper for each of the blend sounds you are working on, e.g. for 's' blends you would have 'sc/sk' 'sl' 'sm' 'sn' 'sp' 'st' 'sw' - Glue/Blu-tac - Pen/pencil - Feely-bag/ other container - A selection of picture cards with words starting with your target blends/clusters - this will either be 's' blends, 'l' blends or 'r' blends - click here for printable picture cards. | 1. Help the child to write a different sound blend in the centre of each sheet of paper. 2. Put all the pictures in the feely-bag or container. Shake it to mix them up. 3. Ask the child to pull one picture out of the feely-bag. 4. Ask them to say the name of the picture. Give them a clue if they are not sure what the picture shows. Model the correct pronunciation if the child says it wrong. 5. Ask the child to stick the picture on the correct piece of paper according to the blend at the start of the word. (Use Blu-tac if you want to be able to re-use the pictures). 6. Repeat until all the pictures have been used up. | If the child finds it hard to hear the cluster at the start of the word when they say it themselves, you could say it to them. If they still find it hard, say the word with a short break after the cluster, e.g. "sk...irt". If the child mispronounces the word say the word both correctly and the way the child says it, and ask them which is the correct one e.g. "is it 'stooter' or 'scooter'?" |
sort items by property and function
| Activity/strategy name and materials required | How to do the activity | Key principles for doing the activity and comments |
|---|---|---|
| Categories Challenge Picture cards. These can be related to class topic vocabulary | Have each adult and child in the group take it in turns to make the cards into 2 groups (or 3 if necessary). The cards in each group must all share a property or a function e.g. made of metal / transport (encourage the children not to base their groups purely on appearance). Write down the categories that are thought of, so that the children can review them. | This is a very flexible activity, which can be used for a very wide range of vocabulary. If the children can read, you could use written words rather than pictures. |
| Shopping List Flash cards with possible properties and functions written on them (e.g. hard, rough, things you wear, things you use to cut with, things you can read, etc.) A dice | If 6 items is too challenging, use a 1 - 3 dice. You could also extend the activity by having the other children in the group add more items to a group. You could stick the flash card into a notebook, and write / draw each item that is thought of around it. Each time you do the activity you will be building up a bank of words linked into categories. | |
| Add One Assorted picture cards. (They can be linked to class topic vocabulary. Make sure there are cards from a range of different categories) | This activity should only be used with vocabulary items the children are familiar with. When the children have a number of cards, it will be easier if they can make more than 3 groups. If they are finding it challenging, remove the time pressure. This means that each child has as long as they need to make 2 or 3 groups. When each child has finished, everyone then takes an additional card. | |
| Semantic Links This activity requires the purchasing of a commercial programme. SLTs/specialist teachers - help to further develop this sheet by providing an example or description of alternative resources to use in this activity. Worksheet from Semantic Links programme - available from Stass Publications Choose one with 3 choices. |
sort materials by properties and function
| Activity/strategy name and materials required | How to do the activity | Key principles for doing the activity and comments |
|---|---|---|
| Object properties race track game Pictures of everyday objects from classroom or home, or real objects. Cards with words and symbols of actions e.g. cut, stretch, squash Dice Counters You can create cards with symbols for actions using the Commtap Symboliser for PowerPoint. | Explain that you are going to be thinking about things you see around you, and what you can do to them. Discuss each of the action cards, and model each action. E.g. stretch - stretch a rubber band Lay the picture cards out in a simple race track. Put the action cards up where you can all see them. Take turns to throw a dice and move round the track. Turn over the picture card you land on and say which one of the actions can be done to that object. The first person to the end of the track wins. | It is important to check the child understands the actions, and knows what the objects are. |
| Object properties card sorting game Cards with words and symbols of actions Bag / box Pictures of objects from school, or home / real objects Sandtimer You can create cards with symbols for actions using the Commtap Symboliser for PowerPoint. | It is important to check the child understands the actions, and knows what the objects are. | |
| Actions with everyday objects Pictures of everyday objects from classroom or home, or real objects. Cards with words and symbols of activities e.g. eat, draw You can create cards with symbols for actions using the Commtap Symboliser for PowerPoint. | ||
| Object properties four in a row game Pictures of everyday objects from classroom or home, or real objects. Cards with words and symbols of activities e.g. eat, draw Counters in 2 colours - 10 each. You can create cards with symbols for actions using the Commtap Symboliser for PowerPoint.
| To make this easier, put cards up where you can see them showing a range of activities to choose from. |
identify and discuss errors made by others
| Activity/strategy name and materials required | How to do the activity | Key principles for doing the activity and comments |
|---|---|---|
| What's wrong pictures What's wrong pictures (e.g. LDA, Colorcards) Pen and paper | 1. Choose a picture (or let the child choose one). Both people look at it. Take it in turns to describe the picture and say how it should look. Make sure you have a new picture to describe each time. 2. Take it in turns to choose a picture, which you keep hidden from the other person. Describe the picture while the other person tries to draw it based on your description. Compare the drawing to the original picture and say how the picture should look. If the drawing does not look very much like the picture, say why this went wrong. | |
| Did I get it right? Large composite pictures (e.g. "passages a decouvrir"). Score sheet (2 columns - one with your name at the top, the other with the child's) Pen | Some children find it extremely difficult to correct adults, even if the adult's mistake means the child gets something wrong (for example colouring a banana blue because the adult passed the wrong pen). You may need to reassure the child that it's ok to correct you. |
Take turns in activities with an adult eg on computer
| Activity/strategy name and materials required | How to do the activity | Key principles for doing the activity and comments |
|---|---|---|
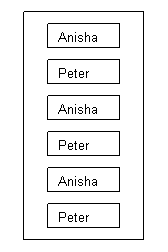
| Taking turns on the computer Computer 2 chairs simple computer programme e.g. a painting programme | Set up the computer with your chosen programme Sit next to the child Show the child how to take turns by: Saying 'My turn' ........'Your turn' etc Support this by using gesture/points Depending on the level of difficulties the child is having, you may also need to do the following: Use a visual timetable with your name in a (drawn) box and then the child's name in a box, then your name in a box and so on i.e. make a list of the turns with names written in boxes For example:
As you take a turn, cross off one of the boxes with your name in it As the child takes a turn help him/her to cross off one of his/her names in a box. | It is important to take a turn even if the child finds sharing very difficult. Start by taking a very short turn for yourself and letting the child have a longer turn. As the child begins to understand that his/her turn will come around again you can lengthen the time of your turns. You can use similar strategies for taking turns in other activities. |
| Taking turns with a computer game. Computer game and two chairs Egg timer |
Developing the skills to understand and express different emotions
| Activity/strategy name and materials required | How to do the activity | Key principles for doing the activity and comments |
|---|---|---|
| Talking about different emotions - Photographs of different people showing different emotions - you could get these from magazines, newspapers or by internet search. - Emotion symbols - click here to print. - Paper and pens | 1. Look through the photographs together - talk about what feelings or emotions the person is showing - you may have different answers from each other. Talk about why they may be showing emotions. 2. Can you match the symbols to the emotions. Talk about the differences you notice in peoples' faces. 3. Can you think of times when you felt this emotion - use the paper and pens to write this down. Compare your experiences. | You may want to start with basic emotion words such as happy, sad, cross and excited, before introducing more complex emotion words. |
| Feeling Dictionary - Exercise book/note pad/sheets of paper - Emotion symbols - click here to print. You can draw your own if you prefer. | Definitions: Happy: This is when I feel good about something. I might smile or laugh. Sad: This is when I don't feel good about something. I might cry. I might show I feel this way by being cross. Angry / cross: This is what I feel when something is not fair, or is bad. I might feel like shouting or punching or doing something to someone. Bored: This is when I'm not interested in what is happening, and just want it to finish. I might sigh, or lean my head on my hand. Upset: I might feel like this when something is not fair, or when someone is unkind. I might cry, or feel like shouting. Frightened / scared: This is what I might feel if I don't know what is happening, or if I am unsafe. I might cry, or scream, or just try not to move. I might want to find someone I know, like my mum or my teacher. Surprised: this is what I feel when something good happens that I didn't expect. I might smile, open my eyes wide, and say something like 'wow'! Excited: This is what I feel when I know something good is going to happen soon. I might smile, move around, and keep thinking about what is going to happen. | |
| If you're happy and you know it... - Emotion symbols (click here to print)or feelings Dictionary (see above) - Time-line of a day | You could choose a different feeling each day to work through the timeline. You could also display the timeline, and encourage the child / children to identify how they are feeling at different parts of the day. |
Appropriate touch and proximity
| Activity/strategy name and materials required | How to do the activity | Key principles for doing the activity and comments |
|---|---|---|
| Proximity game | Have the children stand facing each other in pairs. Tell them to walk forward until they feel they're the right distance away. Discuss how close you can be to others. | Don't let it turn into a boisterous ' bumping into each other game' |
| Brainstorm Photos of familiar people e.g. adults leading the group, class teacher/s, head teacher, all children in the group, other children from the children's class/es, etc. photos of unfamiliar people e.g. child, baby, man, woman, police officer, shopkeeper/ market stall holder, bus driver, person at ticket booth at station etc. - from Flash-pro or internet image search | ||
| Colouring activity Outline drawing of the body e.g. from "pictures, please" or "language steps" for each child red and green pens/pencils | It's ok if children colour different areas, as they may feel differently about being touched e.g. most girls will say they don't want to be touched on their chests, but boys may say it's ok |
Adjust language in different social contexts
| Activity/strategy name and materials required | How to do the activity | Key principles for doing the activity and comments |
|---|---|---|
| What you would say Photos of familiar people e.g. adults leading the group, class teacher/s, head teacher, all children in the group, other children from the children's class/es, etc. Photos of unfamiliar people e.g. police officer, shopkeeper/ market stall holder, bus driver, person at ticket booth at station etc. - from Flash-pro or internet image search. Comment suggestion cards: comment cards can say things like: Hello Hi, mate How old are you? What's your name? How are you? What do you want? Please can you be quiet Shut up Get out of the way! Get lost! Can you help me, please? Good morning Excuse me Oi, you! Are you a boy or a girl? Alright? | 1. Put the photos where the children can see them and check they can identify who every one is. 2. Have a child pick a comment card and decide which people they could say it to and which people they couldn't 3. children can suggest other comments |
Say how you would feel in situations
| Activity/strategy name and materials required | How to do the activity | Key principles for doing the activity and comments |
|---|---|---|
| How would you feel if?: - Pictures/photos of different emotions - a printable set of emotion cards are available here. | 1. Print and cut out the resources. 2. Introduce the activity by having a quick discussion of how it's fine if different people feel differently about the same situation. 3. Take turns to choose a situation card and discuss it together. See if you can match how you would feel to the emotions symbols or pictures. 4. Some children may be able to explain why they'd feel that way e.g. "I'd be scared if I saw a spider because I don't like them'. | Reinforce the idea that there's no 'right' answer. |
Respond to contradictory emotional messages
| Activity/strategy name and materials required | How to do the activity | Key principles for doing the activity and comments |
|---|---|---|
| How do I really feel? Photo emotions cards (e.g. LDA, Colorcards or from Flash-Pro) showing photos of Happy, Sad and Angry faces | 1. Show the child the pictures and ask them to identify the emotion shown. 2. Help the child to think of alternative names for each emotion (e.g. angry = cross, annoyed, vexed, mad, cheesed off, in a bad temper etc. ...). 3. Put the pictures where the child can see them. 4. Say a sentence in a tone of voice that contradicts the message, e.g. "I'm fine, nothing's wrong with me" in a sad voice. 5. Ask the child to point to the right picture (or say its name) for the emotion you portray 6. Ask the child: "how did I say I was feeling?" and "How did I really feel?" | Try to keep the activity fun by moving on quickly. Be prepared to discuss how the child is feeling if they want to. As an alternative to pointing, put the pictures in different locations in the room and ask the child to stand by the picture they select for the emotion you show. |
To be able to display and interpret different emotions
| Activity/strategy name and materials required | How to do the activity | Key principles for doing the activity and comments |
|---|---|---|
| Emotions game Group game for a minimum of three people
| 1. Shuffle the emotions cards and put one face up in each of the spaces on the 1-6 grid. 2. Check the children/young person know what each card says and what the emotion is (remove any that are too difficult and put new cards in their place). 3. Let everyone choose a coloured counter. Everyone puts one of their counters on the “start”. 4. Choose one person to start (perhaps the adult should go first). 5. The person who starts shakes the dice in the cup, and puts the cup upside down on the table. Carefully lift up the cup and look at the dice so only you know which number is on top. Look at the emotions cards on the board to see which emotion corresponds to the number on the dice – but don’t say what it is. 6. Pick a phrase card. Read the phrase on the card, displaying the emotion you have been given. Use your voice and gestures. It’s fine to give children help in reading what the phrase is, but not in how to display the emotion! 7. The other players watch the player acting out the emotion. They decide which of the emotions the player is portraying. They put their other counter on the name of the emotion they have chosen. 8. When everyone has voted, the player who acted the emotion lifts up the cup to show which number was on the dice. 9. Check to see who chose the correct emotion. The people who chose correctly move their counter on to the next space 10. The player who acted also moves their counter on the same number of orange spaces as the number of people who guessed correctly. 11. The next player then has a turn to act. Continue until someone has reached the “finish” space. | This game rewards your child/young person for doing good acting as well as good interpreting; therefore, there is an incentive to display the emotion correctly. Using the coloured counters to "vote" for an emotion prevents people from changing their mind. If the game takes too long to play, use only the orange spaces on the board. |
make predictions about what people would say
| Activity/strategy name and materials required | How to do the activity | Key principles for doing the activity and comments |
|---|---|---|
| What are they saying? Pictures of people talking to each other, for example: Picture books (you may need to cover any writing on the page if this distracts the child); Commercially produced pictures (e.g. LDA - Emotions cards, "Passages a decouvrir", etc); Photos (e.g. family snaps, or photos you have specially prepared); Pictures from comics and magazines; Drawings you have done. Pieces of paper cut into the shape of a speech bubble (you can buy speech bubble-shaped post-its from stationers such as Ryman or on-line) Blu-tac (optional) | 1. Show the child the picture you have selected; 2. Encourage them to have a good look at the picture; 3. Encourage them to talk about what is happening in the picture; 4. Encourage them to think about what the people in the pictures might be saying; 5. Stick a speech bubble on the picture so that it is coming out of each person's mouth; 6. Ask what each person is saying; 7. Write this down in the speech bubble (or let the child write it themself). | If the child finds it hard to work out what the person could be saying, encourage them to imagine themselves in the situation and ask what they would say. |
To order three daily events using pictures
| Activity/strategy name and materials required | How to do the activity | Key principles for doing the activity and comments |
|---|---|---|
| Picture sequences with first/next/last template This is a preparatory activity for working on sequencing daily events. See also the following (at www.commtap.org): Sequences three or more pictures; Sequences three pictures with first next last; Sequence pictures symbols words Materials required: Your own or commercially produced sequencing cards (e.g. Black Sheep press - see "general resources"), Colorcards - available from many educational suppliers) FIRST/LAST template which looks like this (leaving spaces to put the pictures): FIRST LAST FIRST/NEXT/LAST template, as follows (leave spaces for the pictures): FIRST NEXT LAST | 1. Use the first/last template to model the sequence of first and last. 2. Start with 2 picture sequences of a simple event e.g. 'rain falling' 'girl puts up umbrella'. 3. Talk about the pictures. Ask the child 'What is happening in the first picture?' Discuss the consequences of the first picture (getting wet) and what the girl does (puts up the umbrella) 4. Put the two pictures into the template: one in the FIRST column and the other in the LAST column. 5. Do this with a range of 2 sequence picture stories. 6. Turn the cards face down and take turns to turn them over and put them in the right part of the FIRST/LAST template. Can the child tell the story? 7. When the child is confident using the FIRST LAST template to order 2 picture sequences move onto using 3 picture sequences and use the FIRST/NEXT/LAST template. 8. Follow the procedure for working with 2 picture sequences. | Prepare materials in advance. Give a child time to familiarise him/herself with teaching materials and comment on them if needed before starting the learning activity. Give lots of praise. Correct mistakes gently! You can also look confused if the child tells the story in the wrong order. For children who are having difficulties grasping the connection between the picture sequence and an actual event, start with simple sequences you can actually act out - such as pouring a drink - and match a picture with each step of the sequence - e.g. (1) empty glass, full bottle, (2) pouring from bottle into the glass, (3) full glass, half empty bottle. |
| Photos of school life FIRST/NEXT/LAST template Photos of familiar aspects of school life (use a digital camera to take photos) | To help the child build links between the pictures and real events and their order, show them the pictures when the events are actually happening. |
Organise daily routine pictures on school and non school day
| Activity/strategy name and materials required | How to do the activity | Key principles for doing the activity and comments |
|---|---|---|
| Sequencing Strips Pictures of activities relevant to a school day e.g. break time, different lessons Pictures of activities relevant to a weekend day e.g. going to the park, going to the shops A strip of card with Velcro on it, long enough to fit the whole sequence on it / timeline | 1. Start with just one set of pictures; the school day ones will have the least variation and so should be easier. 2. Go over what the pictures are first. 3. Have the child put them in the right order on the strip to fit their own day. 4. Discuss any variation in routines, and use sequencing language such as 'before, after, first, then, next'. Refer to time for well known points, e.g. start of school, lunch time, home time. Emphasise concepts of 'morning, afternoon, evening, night'. 5. Introduce pictures of activities at home and put in order for a weekend or holiday day. When the children are confident with this, you could give them all the pictures and have them sort them out. | If sequencing a whole day is too hard, either reduce the number of cards or reduce the task to just the morning or just the afternoon. You could also put some of the key markers on the strip, e.g. start school, lunch, go home. When the children are confident with the activity, discuss which things they do both on a school day and a non-school day. See also: "order three daily events using pictures" on www.commtap.org |
| Design an ideal day Pens / pencils Paper Glue Scissors | You may need to model this activity by talking about your ideal day. | |
| Commercially available activities Black Sheep Worksheets: There are several relevant packs, including 'times of the day' and 'days'. |
Support Commtap to keep it online
Thank you for visiting Commtap.
Please read this message as it is extremely important.
- Visitor donations mean we can continue to host over 1,000 free activities to support speech, language, and communication development.
- Visitor donations mean we can continue to provide free resources to address a wide range of communication needs, including limited speech or language, interaction challenges, and needs associated with conditions such as developmental language disorder, autism, and cerebral palsy.
- Visitor donations mean we can continue to provide resources to support the work of speech and language therapists, teachers, teaching assistants, parents, and carers.
- Visitor donations mean we can continue to provide the free key word sign dictionary (bks.org.uk) which has over 2,000 Makaton and Signalong signs.
We know that not everyone is able to afford to pay to access these resources, however, if you can, please make a donation to keep the site going.
Thank you

Google ads on this page are provided by Google Adsense - and their presence does not imply any endorsement by Commtap. Report a problem with an ad on this page. Log in (for free) to avoid seeing Google ads.